Good Eats in LA | Baco Mercat

Feng and I ventured to downtown LA and ate lunch at Baco Mercat. The food is as good as they say it is on Yelp! haha.. Although we only ordered three dishes, all the other ones that passed us looked delicious. My favorite is the Caesar Brussel Sprouts. Feng isn't the biggest fan of brussel sprouts but the caesar really helps take away that brussel sprout taste that people don't usually like.
Love this gold door!
caesar brussel sprouts - pecorino, anchovy, garlic
pickled vegetable salad - dill, yuzu, white soy vinaigrette
el pollo - chicken escabeche, lebni, zhoug, confit pork

We were so stuffed we took a stroll around the area and stumbled upon ...

A visit to Uncle Tony's Loft

We met Uncle Tony for the first time at his loft in the village of NYC. He and his wife fell into the category of "cool couple" the second we met them and stepped into their place.

Uncle Tony, an architect, designed and furnished the place with furniture he built - yup, everything from the counters, the book shelves, the bar, to the partition walls and the desks.  His wife on the other hand, a painter, adorned their loft with her own floral paintings.   There was a surprise behind every corner. We thought this was a must share!   

Entrance to the loft.
The study.
Everything he built in the kitchen
The Bedroom.
2nd open study & mini workout area by the back wall.
 Painting area.
The coolest bit of all... their giant removable swing.  
I wish I had a swing in my apt!

Photoshoot at Home

Ed and I decided to arrange a casual photoshoot at home before Maddie's first birthday to capture some moments of our family as the three of us before #2 arrives! Our friend Angel recommended a local photographer, Thomas Ng, who did a few photo sessions for her family previously. I liked the way how Thomas stayed more or less in the background, observing us and snapping away instead of directing us too much. The photos turned out really natural and I loved the composition of a lot of the photos. Here are some highlights!

Haha I love the expression of Ed and Maddie here
- T

It's Brunch Time


My good friend from home came to visit LA this week to help her sister move into a new apartment. We took them to Melrose for some scrumptious brunch and a little shopping. Although we waited about an hour for a table at Blu Jam (only because we had a dog with us), we were so hungry that every bite was to die for (food post coming soon!).  

I haven't seen these girls for almost a year! So despite the wait, it was so great finally catching up with them! 

Anyway, thought I'd try this new hand cuff out!
STYLE | sunglasses: from my mom's closet | hand cuff: topshop | shorts: nastygal | clutch: kimski
PHOTOGRAPHER | ryan feng


- C


DIY: Marquee Light

When I lived in the OC, I came across this cute store called Oh Hello Friend in Downtown Fullerton. It sold little knick knacks, jewelry, stationary and more. I stepped into the store for the first time, and knew it was game over. And yes, I was right - I bought too many things my first time and went back for more a week later. I chatted with the Sales Associate and she told me to check out the blog. If you haven't been there, you should go check it out!

I came across this lovely DIY to make a Marquee and if you follow me on Pinterest, you know that I LOVE letters, so I decided to make one myself. 

You can check out the tutorial I followed here on Oh Hello Friend Blog, OR you can follow along below. If you ever try this, feel free to ask me any questions!

Things you'll need:
- 8" or 12" Paper Mache Letters
You can get them online from Consumer Crafts or I bought mine at Joann's. Etsy also has them but a little bit more expensive.

- Spray Paint
I used Rust-o-leum like their tutorial because I love the Metal look. But you can use other colors and textures as well. I got mine at Michael's but they also sell them at Home Depot.

- String Lights 
I found mine in the outdoor section of Target. Depending on how many letters and how many lights you'd like, you may need more than 1-2 packs (I used 1.5 packs and saved the extra bulbs for another project).

- Xacto Knife

- Drill 
I got mine at Home Depot and they were really helpful in finding one that is easy to use. Mine is a Ryobi and the drill bit is 5/16. Super light!

Let's Begin!!

1. Cut along the edges of the letters. I didn't leave any space for more surface area and cut right along the edges.

2. Flip the letters over and pencil in the spacing you'd like between each bulb. Then drill through the cardboard where you have marked.

3. Find an outdoor space and spray paint your letters.  The back is not necessary. I waited a few hours and they were all dry!

4. Take your bulbs and put them through the drilled holes, and attach the string at the back.

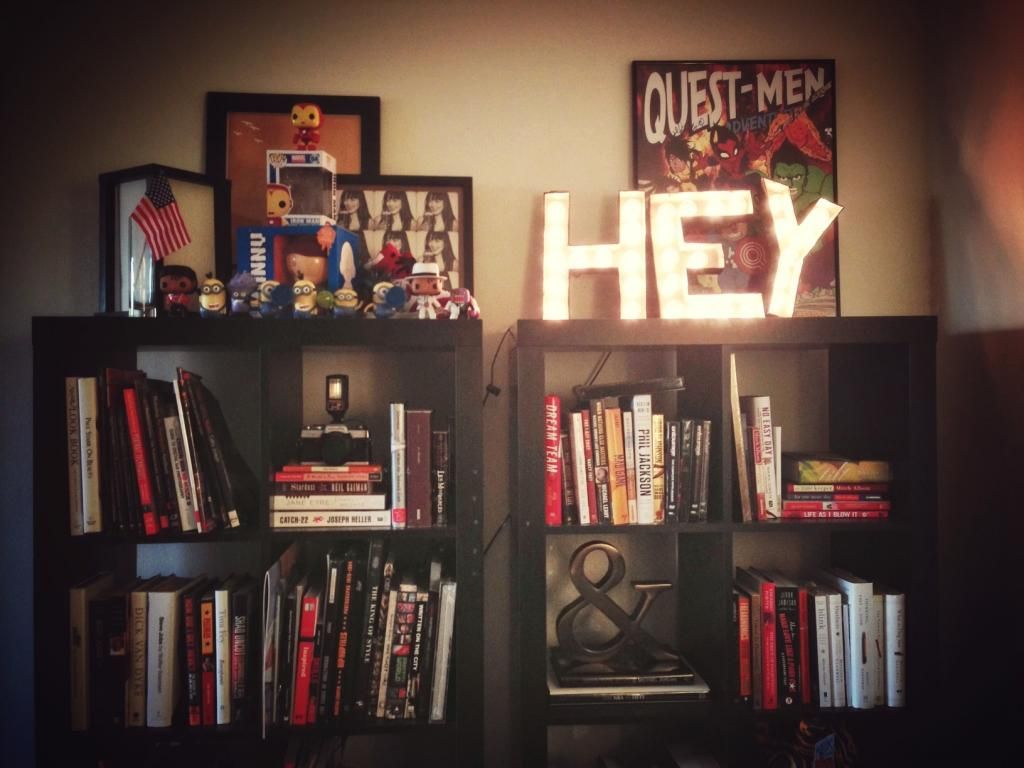
5. After you've done that for all your letters.. TA DA!! Plug them in and test it out!!

I put it on top of my bookshelf, but I haven't filled the space up yet. What do you think?